
0 items
in your cart
ITEMS:
TIPS:
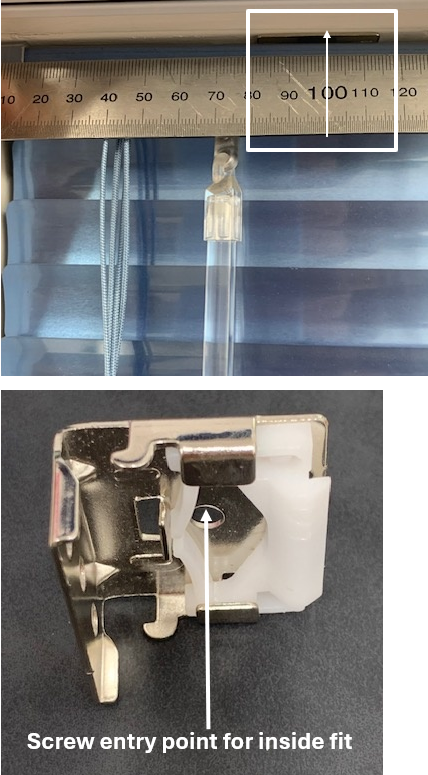 | Carefully remove outer plastic wrapper, take care not to bend any slats. Once they are bent you cannot bend them back into place without leaving a kink. Release the brackets and screws from the plastic wrap. Start by installing your first two brackets, your left-most and right-most brackets. Using a metal tape measure and pencil, mark 100mm in from the inside edge of the frame on the inside left top underside of frame. Repeat again on the right. Place the brackets on top of the marks and screw into place. The reason for this placement is so that the brackets are clear of the lift and tilt mechanism once the blind is installed. If you do not follow this tip you will have issues with tilting blind. Before contacting us about a tilt issue, be certain that no bracket is near a control mechanism or a ladder tape. |
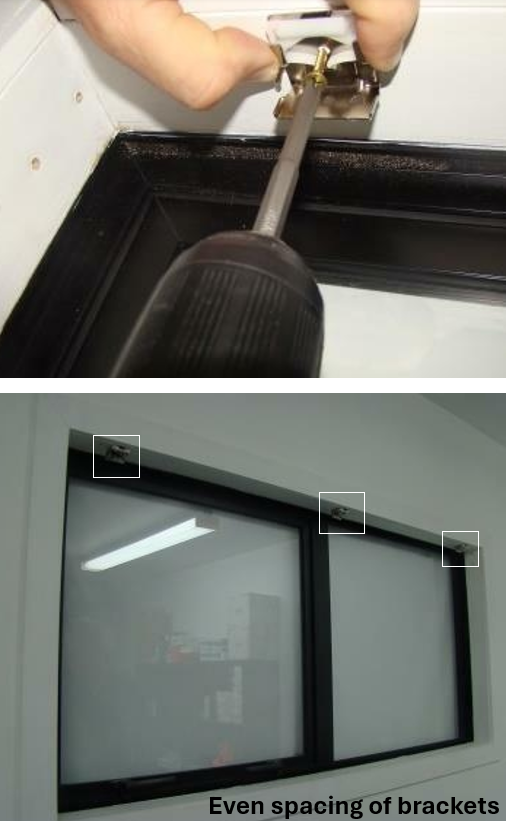 | With the remaining brackets, you will need to evenly space them out along the top of the frame between your left and right brackets you have just installed. You must make sure brackets do not interfere with the tape rolls inside the headrail. For best practice, hold blind up to window, take note of ladder tape placements to find where you can fix the remaining brackets, again make pencil marks. then screw into place. If you get a placement wrong you can always take brackets down and move them. |
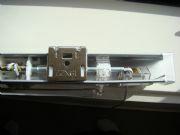
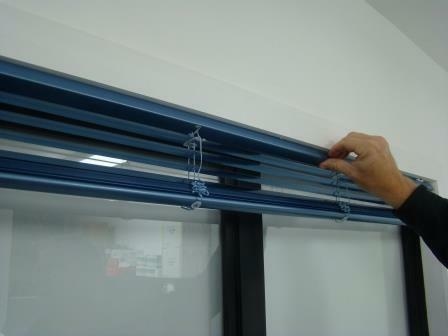 | Now that your brackets are evenly secured inside your frame, pick up your Venetian blind, it must be in the up position so leave it pulled up like it came in the packaging. Look down into the tracks headrail, notice the track profile and how the brackets will hook into place. On the inside front of the headrail at the top there is a lip. Hook this lip over the front of the bracket then push the back of the headrail up into the bracket until you hear it click into place for each bracket. |
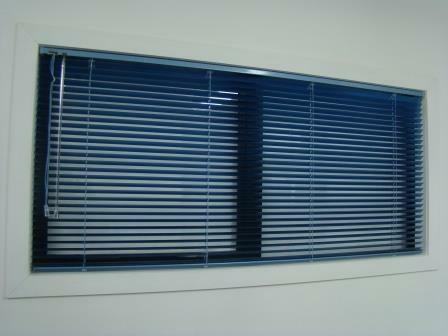
| This is how it should look once completed. Pull the cords toward the middle of the blind, this releases the cord lock allowing you to lower the blind. Use the wand to control the angle of the slats. Frequent lifting and locking off of the blind in the same position daily will wear your cords, overtime requiring a full re-cord. It is advised to leave blinds in down position and tilt as required. If you intend to lift and lock often try locking off blind in different points so the same piece of cord isn't always under the tension the metal cord lock. |
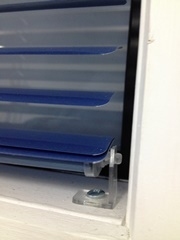
Hold Down Clips (if required) are mounted at the bottom of the blind to secure the blind in a fixed position. These clips are especially useful to eliminate the possibility of the blind moving around in a breeze especially near doors and can be easily released when you want to pull the blind up for cleaning purposes. When mounting the Hold Down Clips do not put too much tension on the blind to allow for some movement. Place the pin into the end caps of the Venetian blind to lock into place.

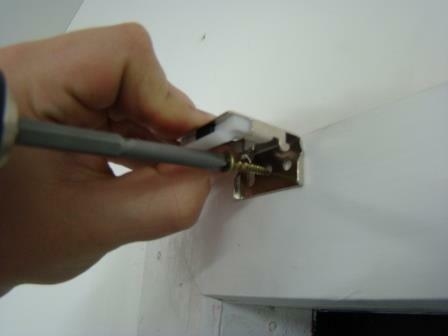 | Carefully remove outer plastic wrapper, take care not to bend any slats. Once they are bent you cannot bend them back into place without leaving a kink. Release the brackets and screws from the plastic wrap. Starting from the left side of the frame, using a metal tape and pencil make a mark at 85mm in from the outside edge of the frame. Repeat at the opposite edge. Pre-drill your holes using a 4mm drill bit so you don't spilt any timber framework. Place the brackets in the middle of the marks and screw into place. Going 85mm in means the brackets will not interfere with any mechanisms. |
 | For blinds requiring more brackets space them evenly making sure they don’t interfere with the tape rolls inside the headrail. |
 | Now that your brackets are evenly secured to your frame, pick up your Venetian blind, it must be in the up position so leave it pulled up like it came in the packaging. Look down into the tracks headrail, notice the track profile and how the brackets will hook into place. On the inside front of the headrail at the top there is a lip. Hook this lip over the front of the bracket then push the back of the headrail up into the bracket until you hear it click into place for each bracket. |

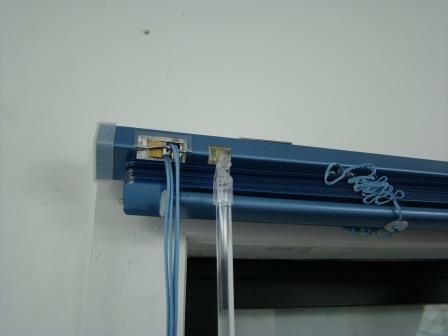 | This is how it should look once completed. Pull the cords toward the middle of the blind, this releases the cord lock allowing you to lower the blind. Use the wand to control the angle of the slats. Frequent lifting and locking off of the blind in the same position daily will wear your cords, overtime requiring a full re-cord. It is advised to leave blinds in down position and tilt as required. If you intend to lift and lock often try locking off blind in different points so the same piece of cord isn't always under the tension the metal cord lock. |
Hold Down Clips (if required) are mounted at the bottom of the blind to secure the blind in a fixed position. These clips are especially useful to eliminate the possibility of the blind moving around in a breeze especially near doors and can be easily released when you want to pull the blind up for cleaning purposes. When mounting the Hold Down Clips do not put too much tension on the blind to allow for some movement. Place the pin into the end caps of the Venetian blind to lock into place.